All posts tagged Jewelry
The Cuttlebug embossing folders can be used for more then just paper. I busted out some Sculpey clay recently, rolled it into a thin pancake and then pressed it into the embossing folders. For the bird cage I used the 12″ Embossing Border, Caged Bird and for the bird I used the Birds and Swirls folder. To finish them I used sharpie thin pens to draw on top of the outlines to add a little Lula to them! Once the pieces were cooled out of the oven I strung them on a hot pink rubber chain. For the complete tutorial click here: Sculpey Bird and Cage Necklace Happy crafting xoxo Lovely Lula
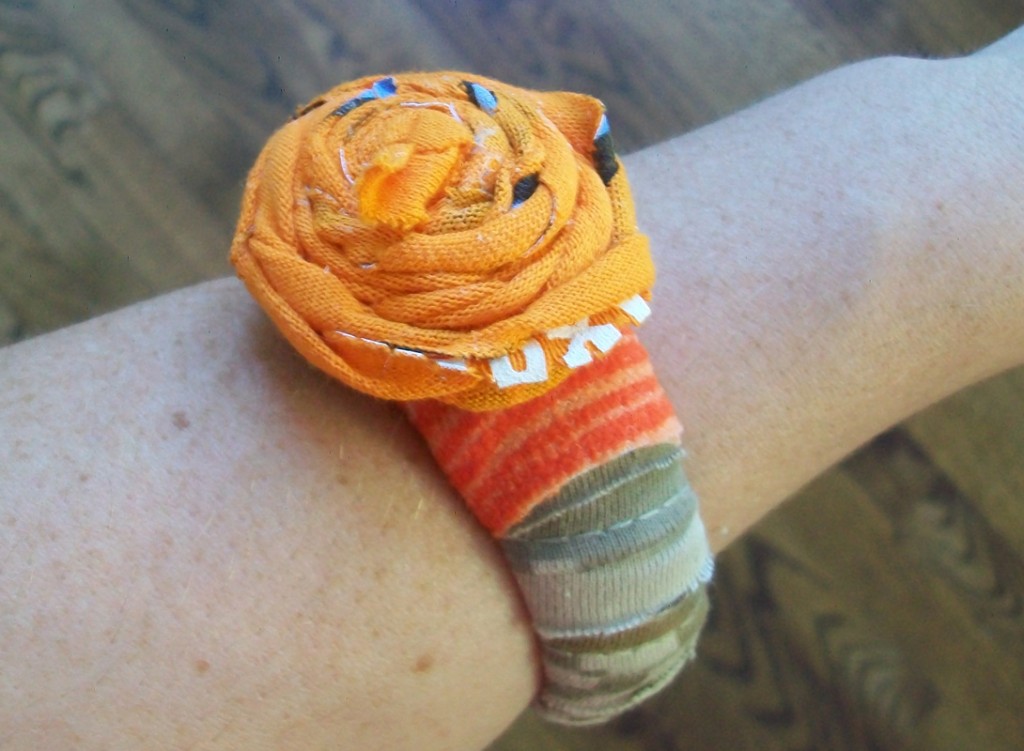
To say I am loving the T-shirt yarn would be an understatement. I made a T-shirt yarn bracelet to go with the ring I made the other day. If you haven’t made T-Shirt yarn before purchase one of my T-shirt Yarn Kits click HERE to shop. Once you’ve made the yarn then it is really just a matter of selecting what color to work with and then deciding on how large you would like your topper flower to be in both height and width. After that you follow the How To provided Here: T-Shirt Yarn Bracelet Allow for a little drying time and then you are off and running with your wrist decoration. Enjoy! xoxo LL
To purchase one of my T-shirt Yarn Kits click HERE
I have had a roll of window screening laying around, left over from another project and got to thinking how could I make some jewelry out of that? I grabbed my Cuttlebug and my Skull and Crossbones die called Beware and went for it. For one of the pieces I used pink embroidery thread around the outer edges and then coated it with a stiffener. The next piece was made from a plastic sheet I picked up at a hobby shop. I ran this one through the cutting die and then the matching embossing folder, I used pink flocking for the eyes. For the final piece I covered it in pink craft paint which will fill in some of the holes and then top coated it with stiffener. The black and white fabric came from a scarf that I found at a dollar store and ripped up to make little shredded pieces to tie on. Finally, I put everything onto a hot pink plumbers chain I picked up at a local bead store. You could create a necklace like this using any Cuttlebug dies and embossing folder combos. For my Tutorial Click Here:Â Skull and Crossbones Necklace How To Happy crafting xoxo LL
Playing with the sheets of shrink plastic is fun times! I made this super cute house ring. Those most important thing is just to remember scale because the plastic shrinks 75% or so. To glue the house to the band I used E-6000 glue which glues together anything but silicone. The second photo is the underside of the ring which I glued a piece of felt to to soften the blow in case I hit my hand down too hard on a table so I don’t crack the plastic. So fabulous and so fun to wear!
I have had so much fun making jewelry out of sheets of shrink plastic. I had forgotten the process completely, so my first round heating the stuff was a little startling. I forgot that it curled up onto itself before laying down flat and just how much it does in fact shrink – whoa! Boy is it fun to watch and so satisfying! I used my Cricut to cut the shrink plastic. Then colored the little critters in with Sharpie markers, next I hit it with a heat gun and boom – instant charms! I attached the shrinky dinks to a 1980′s plastic charm necklace chain I had. I love this necklace and will have a lot of fun wearing it. For a tutorial click here: Shinky Dink Necklace How To. Happy Crafting xoxo Lovely Lula


